Pipeline Schedules
Notes:
- This feature was introduced in 9.1 as Trigger Schedule.
- In 9.2, the feature was renamed to Pipeline Schedule.
- Cron notation is parsed by Rufus-Scheduler.
Pipeline schedules can be used to run pipelines only once, or for example every month on the 22nd for a certain branch.
Using Pipeline schedules
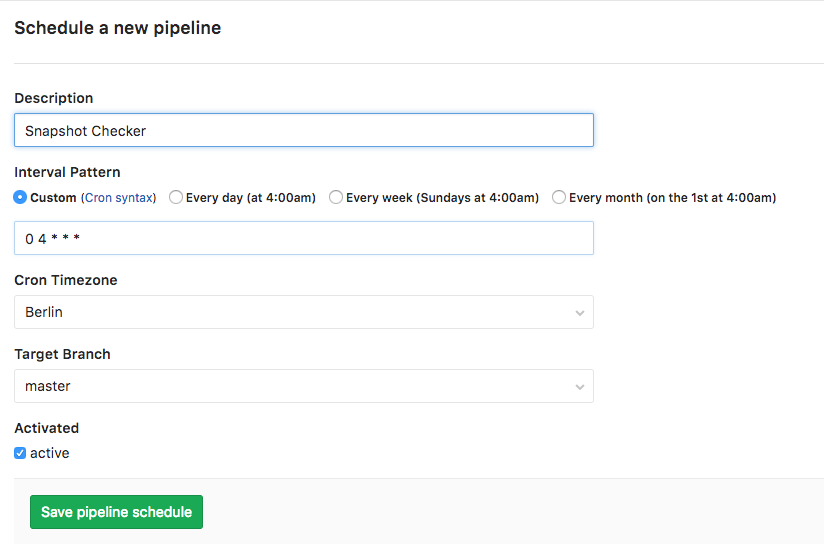
In order to schedule a pipeline:
- Navigate to your project's Pipelines ➔ Schedules and click the New Schedule button.
- Fill in the form
- Hit Save pipeline schedule for the changes to take effect.
Attention: The pipelines won't be executed precisely, because schedules are handled by Sidekiq, which runs according to its interval. See advanced admin configuration for more information.
In the Schedules index page you can see a list of the pipelines that are scheduled to run. The next run is automatically calculated by the server GitLab is installed on.
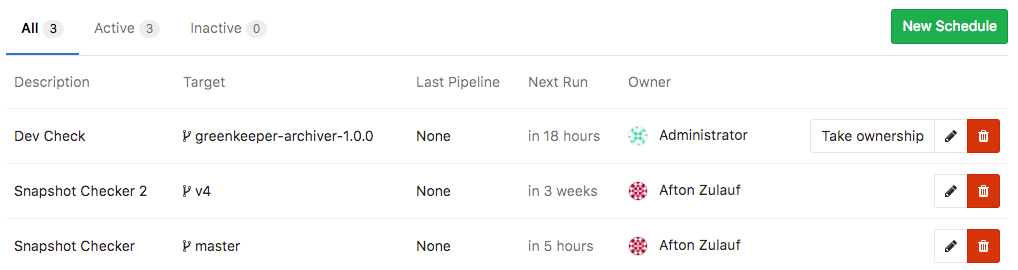
Taking ownership
Pipelines are executed as a user, who owns a schedule. This influences what projects and other resources the pipeline has access to. If a user does not own a pipeline, you can take ownership by clicking the Take ownership button. The next time a pipeline is scheduled, your credentials will be used.

Note: When the owner of the schedule doesn't have the ability to create pipelines anymore, due to e.g., being blocked or removed from the project, the schedule is deactivated. Another user can take ownership and activate it, so the schedule can be run again.
Advanced admin configuration
The pipelines won't be executed precisely, because schedules are handled by
Sidekiq, which runs according to its interval. For example, if you set a
schedule to create a pipeline every minute (* * * * *) and the Sidekiq worker
runs on 00:00 and 12:00 every day (0 */12 * * *), only 2 pipelines will be
created per day. To change the Sidekiq worker's frequency, you have to edit the
trigger_schedule_worker_cron value in your gitlab.rb and restart GitLab.
For GitLab.com, you can check the dedicated settings page. If you
don't have admin access to the server, ask your administrator.